There is a new feature that is introduced in
IBM Content Navigator (ICN) 3.0.4 of Recycle bin. When enabled, users can place documents into the Recycle Bin and remove them or restore them at a later time. Each user has a personal recycle bin. Here is the tech note which described best
https://www-01.ibm.com/support/docview.wss?uid=ibm10715845&myns=swgother&mynp=OCSSEUEX&mync=E&cm_sp=swgother-_-OCSSEUEX-_-E while steps along with their configuration screenshots are described below:
Installing the Recycle Bin plug-in
- Log into IBM Content Navigator and open the Administration desktop
- Go to Plug-Ins in the Administration desktop.
- For New Plug-in, enter the RecycleBinPlugin.jar full path in the "JAR file path" and click the "Load" button. The RecycleBinPlugin.jar can be found in <ICN_INSTALL_HOME>\plugins.
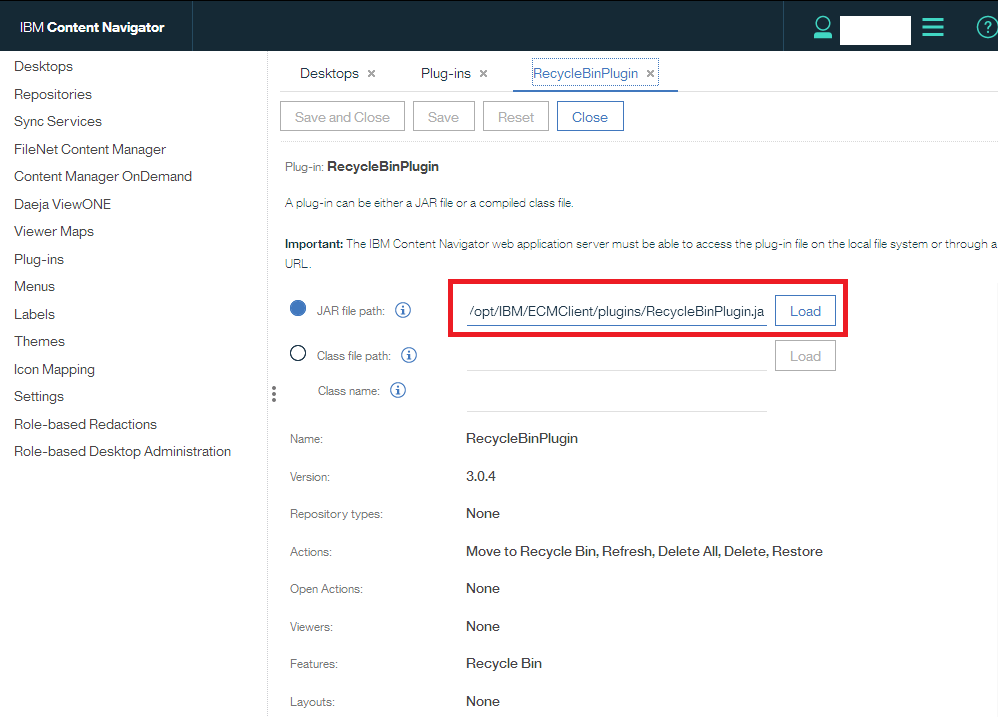
- The following actions should be displayed: "Move to Recycle Bin", "Refresh", "Delete All", "Delete", and "Restore".
- Click Save.
Enabling the Recycle Bin on the repository
To enable the Recycle Bin feature, you must have permission to create a class and a property template. An administration user is preferred.
- Open the Recycle Bin plug-in, and then scroll to the bottom. There is a drop-down list for selecting a repository. Select the repository on which you want to enable Recycle Bin.
- A login window displays. Log into the repository.
- By default, Recycle Bin is not enabled on a repository. Select "Enable" to enable Recycle Bin on the repository.
- You can optionally define a sweep policy by specifying an expiration date, which will allow the system to automatically remove all documents older than the date you specify.
Configuring a desktop for Recycle Bin
- Open your desktop and go to Menus in the administration desktop.
- Locate and then select the "Default document context menu." Search "default document" by filtering.
- Click the Copy button on the toolbar.
- Give the copied menu a name, such as "Document Context Menu with recycle bin." Add the "Move to Recycle Bin" action from the available list to the selected list. Save your changes.
- (Optional) If want to use Recycle Bin in the team space feature, repeat step 2-4 with "Default teamspace content list context menu" menu.
- Go to Desktops in the administration desktop and edit your desktop.
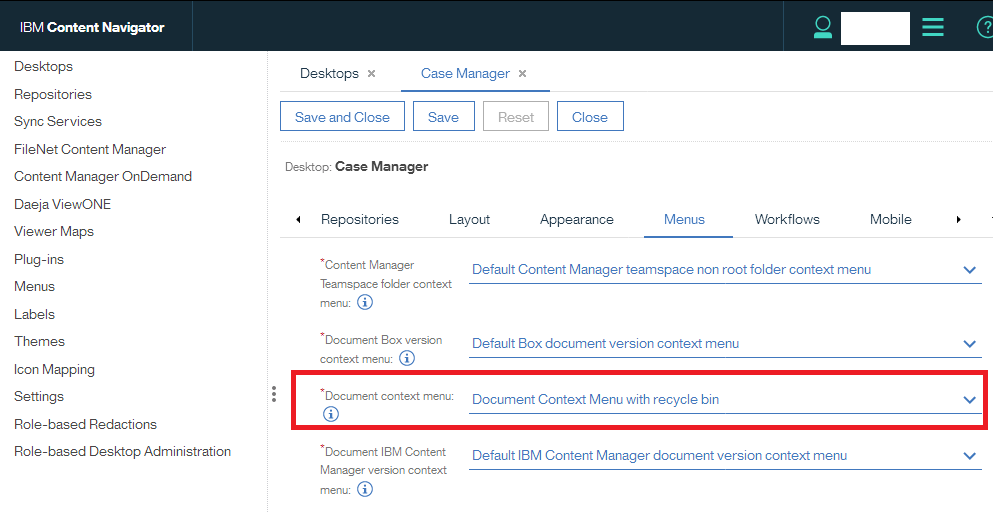
- Go to the "Menus" tab and find "Document context menu."
- Select "Document Context Menu with recycle bin" from the drop-down list, and then save your changes.
- (Optional) To use Recycle Bin in the team space feature, change the "Teamspace content list context menu" to the newly created custom team space menu.
- Go to the "Layout" tab and select "Recycle Bin" from the feature list.
- Select a repository in the feature configuration. Only repositories with Recycle Bin enabled are listed. Select at least one repository and set the default repository.
- Save the desktop.
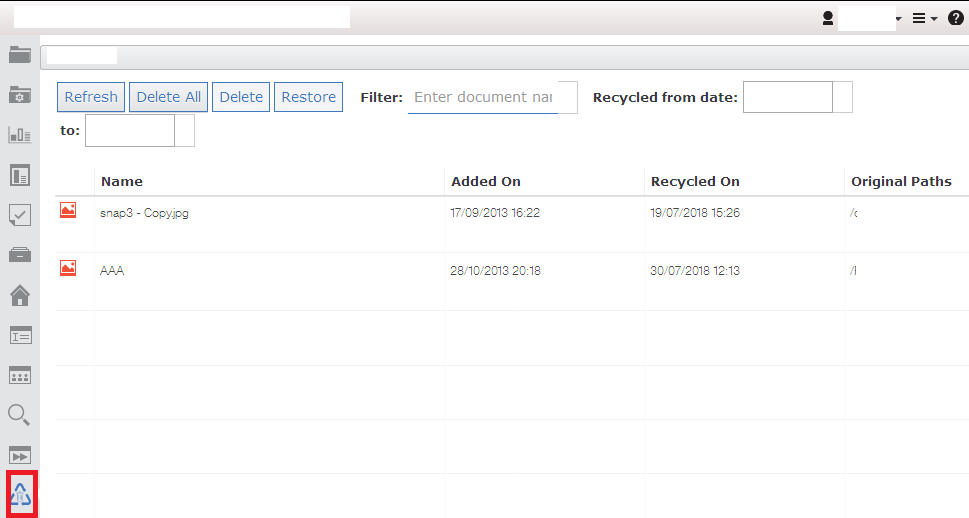
Refresh your browser. You will see the "Recycle Bin" in the feature list. You will also see the "Move to Recycle Bin" menu when you right-click on a document. You can remove everything from your recycle bin by selecting "Delete All," and provided you have the Delete permission.


0 Comments
Leave a Reply
Your email address will not be published. Required fields are marked *