You can optionally enable email notification of workflow activities. Users can configure which notifications they want to receive and their preferred locale. For example, users can choose to be notified when work is assigned or when work is approaching or passes a deadline. Configure email notification on the workflow system, in IBM Content Navigator and in the Case Manager Client.
Enabling notification in the Administration Console for Content Platform Engine
Before you can enable email notification on your Content Platform Engine system,you must specify a language pack. You specify the language pack and enable notification by using the Administration Console for Content Platform Engine.
To enable notifications do the following accordingly:
- Log in to Administration Console for Content Platform Engine.
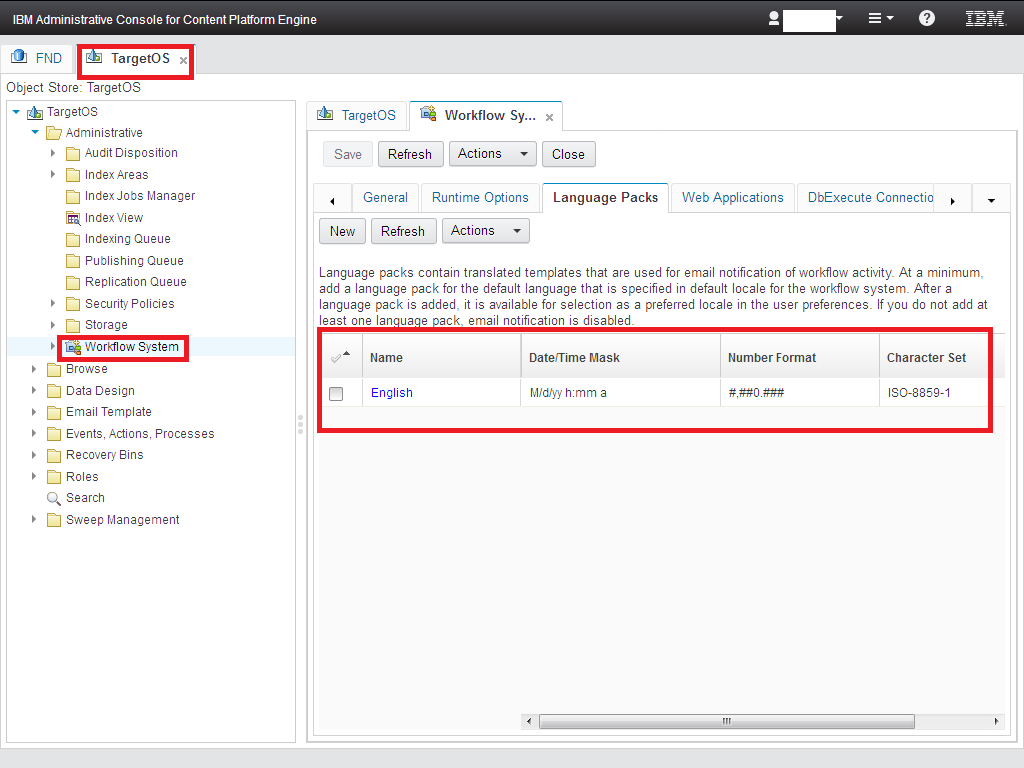
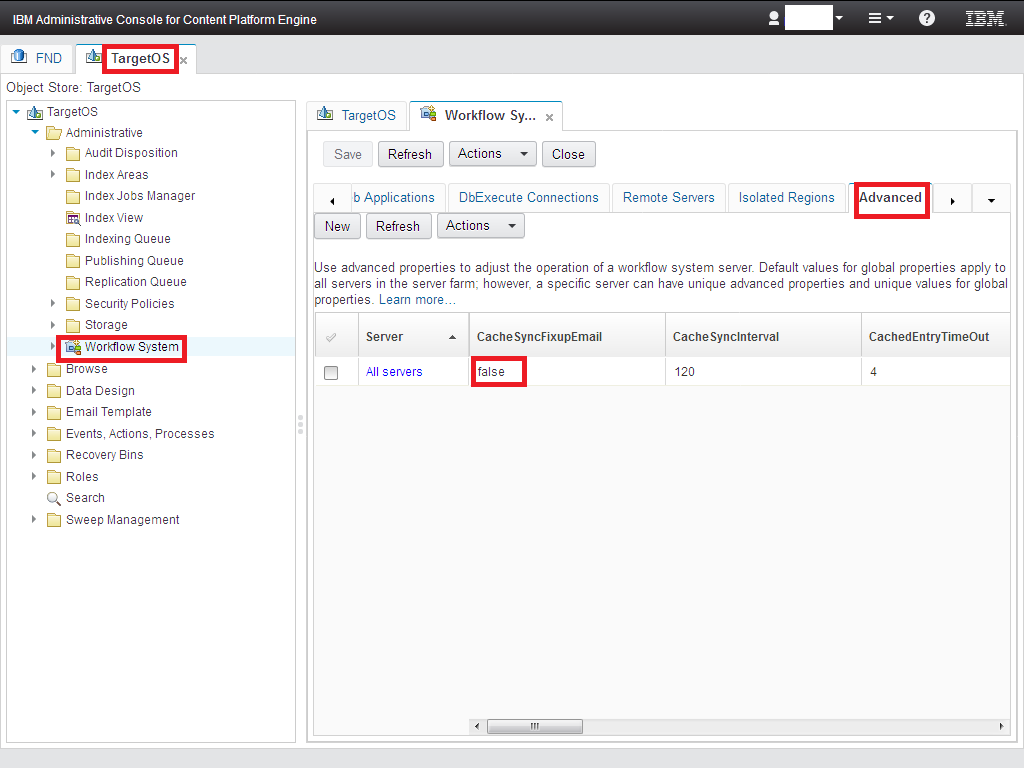
- Expand Object stores, right-click your target object store, and click Administrative>Workflow System.
- Click the Language Packs tab, and click New.
- Add your language pack.
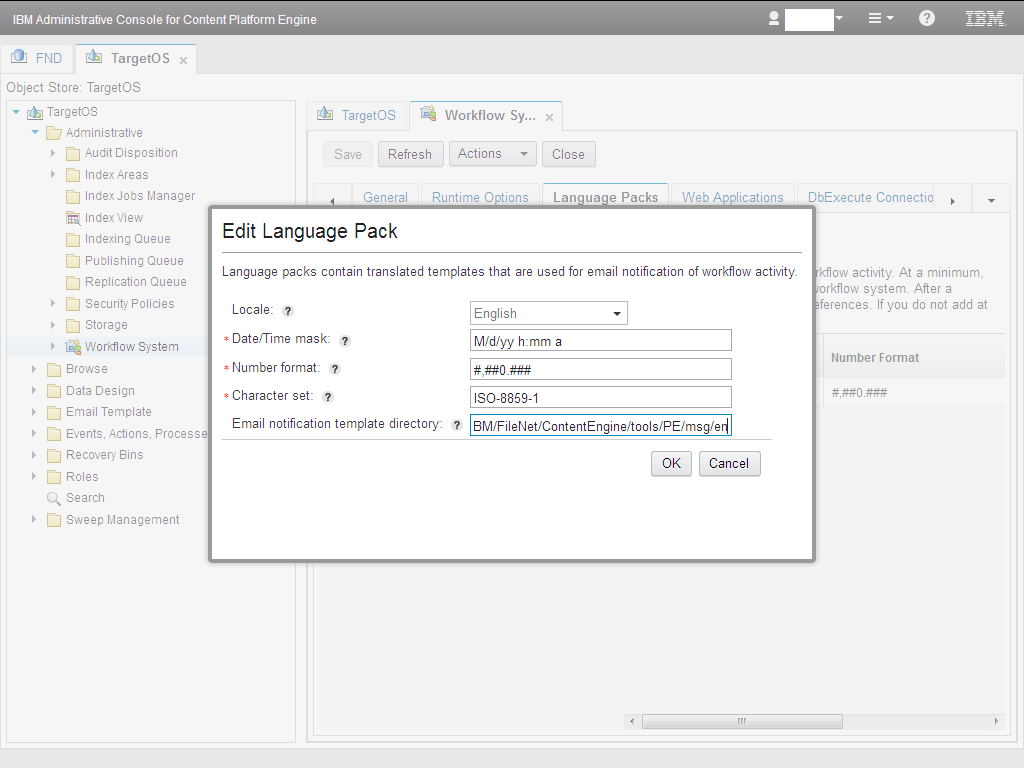
- Select your locale from the drop down menu. The locale selection will auto fill the date time mask.
- Enter the Content Platform Engine template path. The default email template directory is <install_path>/IBM/FileNet/ContentEngine/tools/PE/msg/en.
- Save your changes.
- Configure the Remote Servers settings:
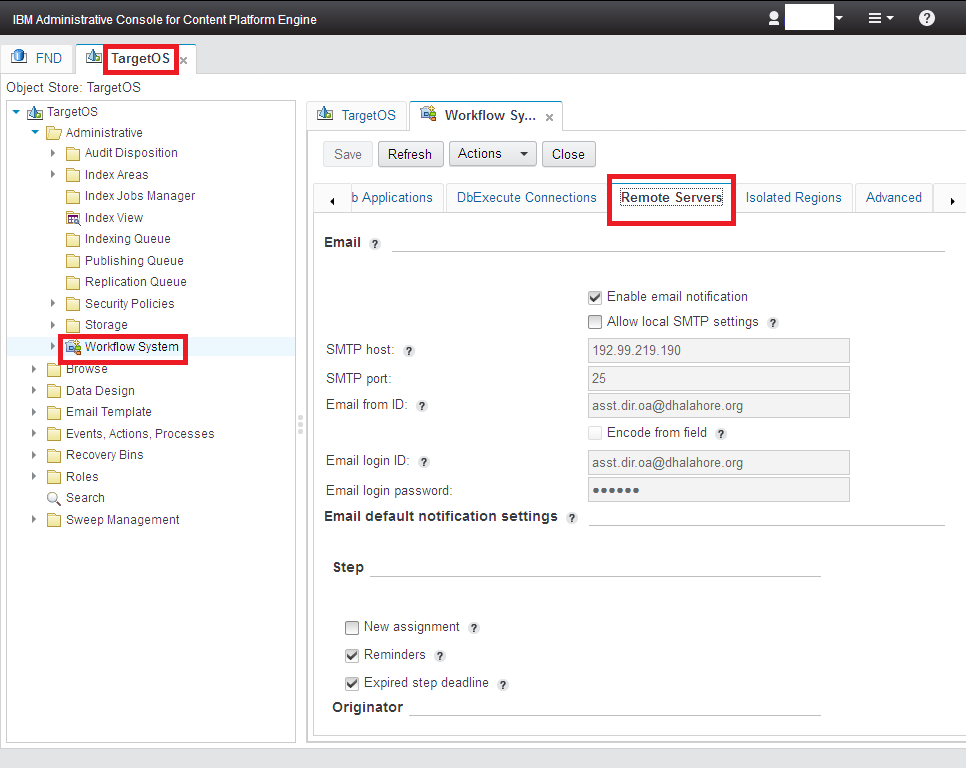
- Click the Remote Servers tab.
- Check the Enable email notification check box.
- Enter the host name and port values for your SMTP server.
- Provide email ID as the sender of your notifications.
- Mention login ID and password for the system user that logs into the server and sends the notification.
- Save your changes.
- Click the Advanced tab.
- In the server list, change the value for the CacheSyncFixupEmailsetting to false. The default value for this setting is true.
- Save your changes.
Enabling notification in IBM Content Navigator
- Log in to IBM Content Navigator as an administrator. Enter the following URL in a browser: http://server:port/navigator server is the IBM Content Navigator server name or IP address. Port is the IBM Content Navigator port number.
- Navigate to Repositories>Your target object store>General, and click Connect.
- In the Configuration Parameters tab, make sure that the Workflow connection point field contains a valid value.
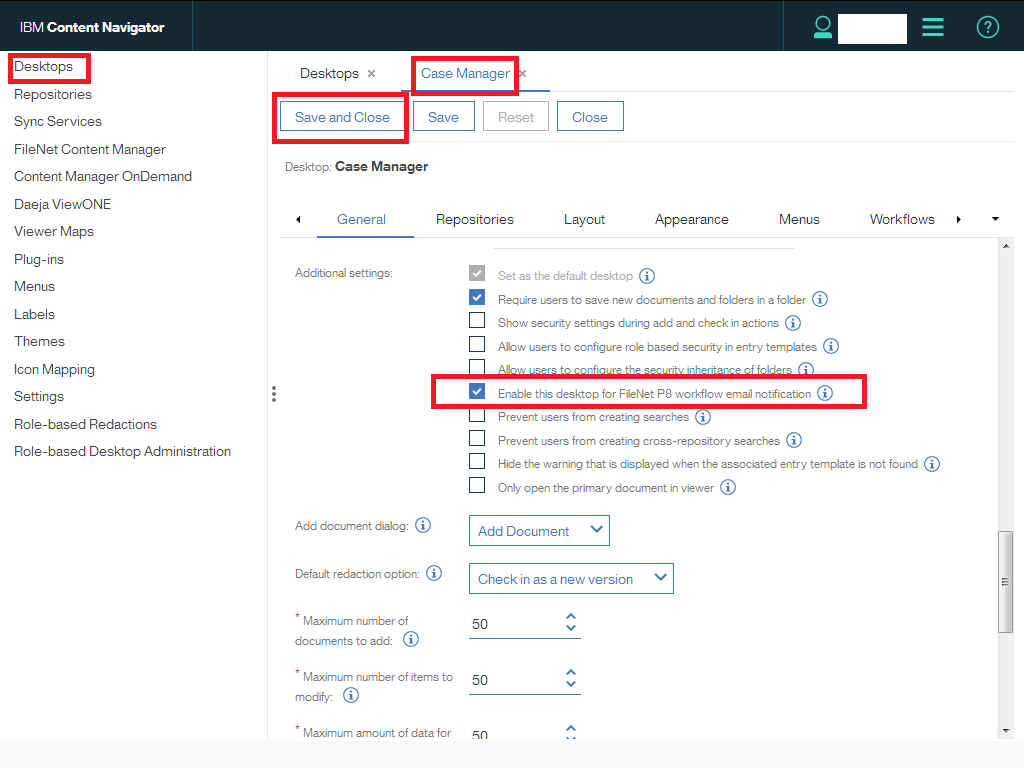
- Navigate to Desktops>Case Manager>Edit.
- On the Appearance tab, Select Work as a feature, and make sure that the target object store is specified as the default repository.
- On the General tab, in the Additional Settings pane, select Enable this desktop for FileNet P8 workflow email notification.
- Save your changes.
Enabling notification in Case Manager Client
- Log in to the Case Manager Client by accessing the default IBM Case Manager desktop from a browser: http://server_name:port/navigator/?desktop=icm
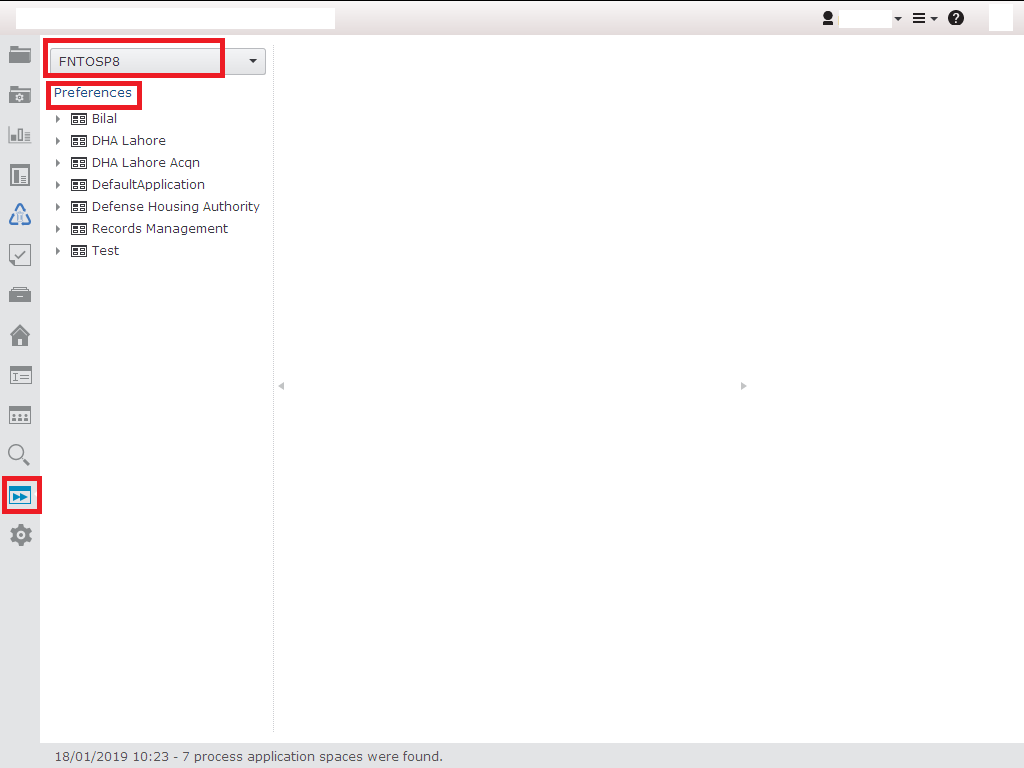
- Open the Work view and click Preferences.
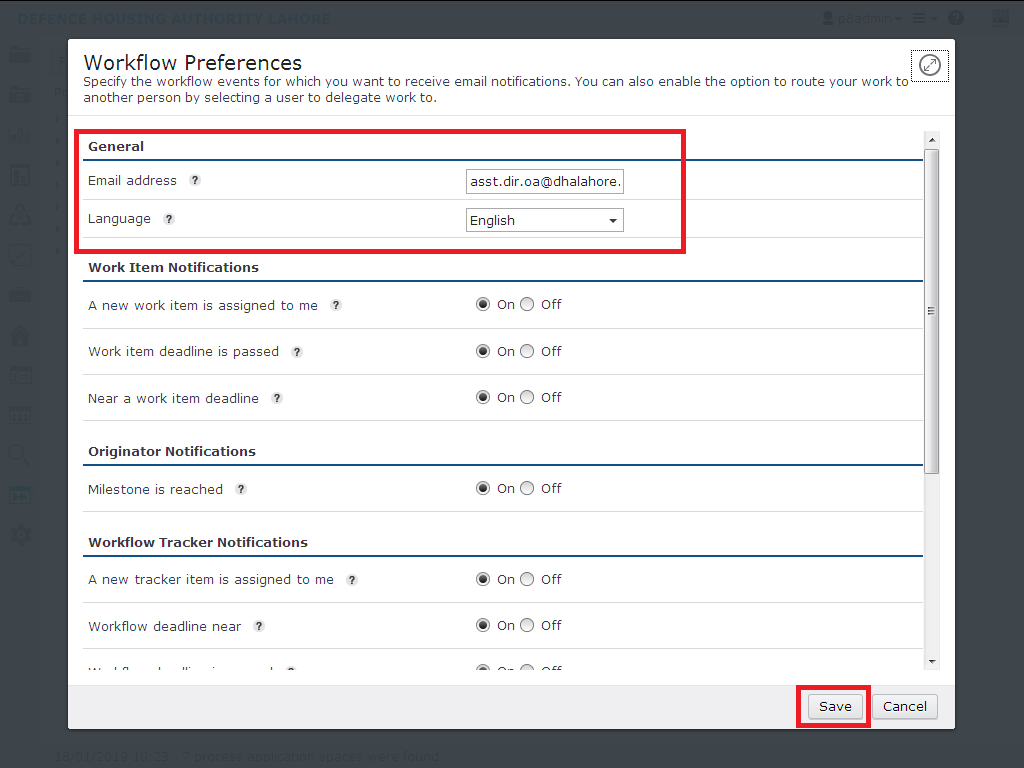
- Enter the email address where you want to receive notifications.
- Use the On radio buttons to select the events for which you want to receive notification.
- Save your changes.
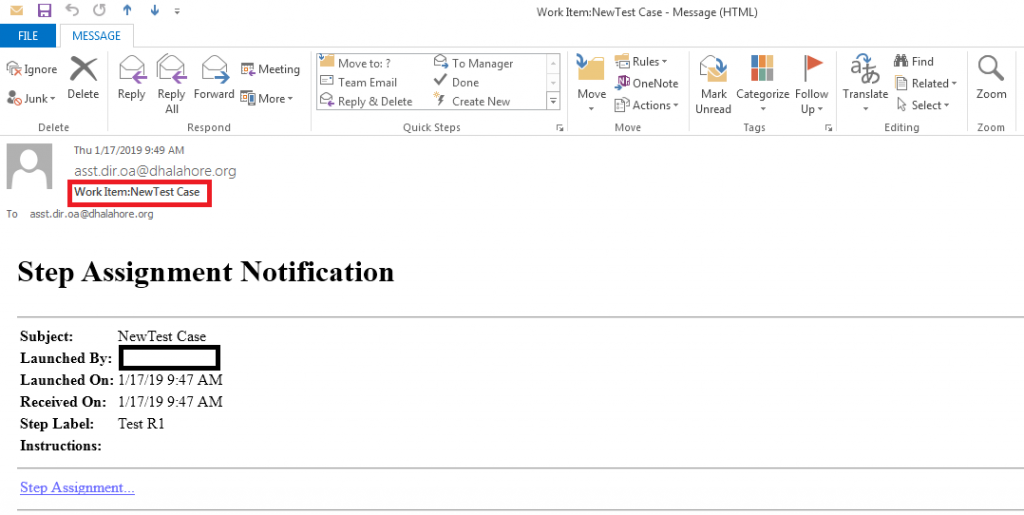
Once you done these settings steps by step, try to create a new case in ibm case manager client. After adding case you will see an email notification will send to recipient that you define earlier in ibm case manager client as mentioned below:
For details, please visit to this tech note: https://www-01.ibm.com/support/docview.wss?uid=swg27039122&aid=1
